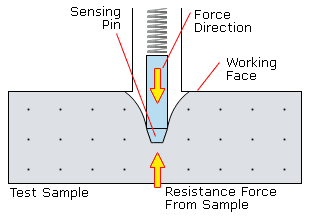
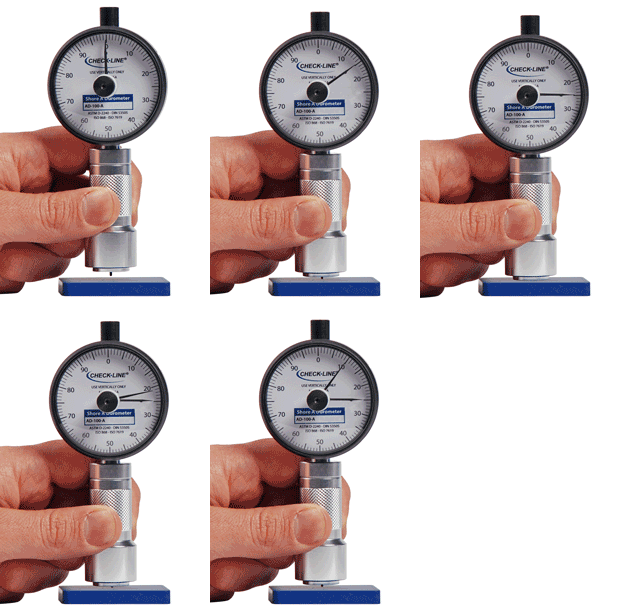
The principle used to measure hardness is based on measuring the resistance force of the penetration of a pin into the test material under a known spring load. The amount of penetration (max. 2.5 mm) is converted to hardness reading on a scale with 100 units.
1. Whenever possible, a Durometer measurement should be taken at least 12 mm (approx. 0.500") in from the edge of a sample, as the hardness characteristic of any sample tends to change at at the edges.
2. Whenever possible, the thickness of a sample should exceed 6 mm (approx. 0.250"). If the sample is thinner then this, then the sample can be backed with a sample of the same material to increase the thickness.
3. Test Coupons or test blocks (rubber or plastic) should not be used for calibration verification. As all samples are subject to characteristic changes over time along with temperature and lighting conditions, the rated Shore value when supplied as new can and will vary with age. Proper calibration verification requires independent confirmation of the internal spring forces along with the verification of the pin displacement vs. the indicated value on the scale.
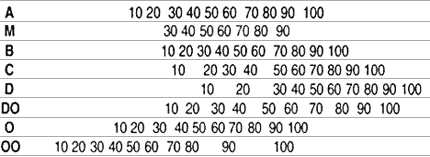
4. Per the ASTM Standard D 2240, readings below 10 and above 90 are not to be considered reliable and should be discarded. Therefore, it is important to select the approapriate Scale that will provide results between 10-90 units.
ASTM D-2240
Principle of Operation
•Frequently Asked Questions
"My durometer rests below zero, is it out of calibration?" This is a common question asked by durometer users. The answer to the question, in most cases, is no. Certain durometers rest at roughly six points below zero: this is because the gauges are made in accordance with ASTM D2240, which states that some durometers have a preload of 56g at a zero reading. Therefore, a durometer giving a less-than-zero reading at rest is not out of calibration.
| Type | Application | Indentor | Spring Force | |
| A | Soft rubber, plastics and elastomers. | Flat cone point, 35° |  |
822 g 1.81 lb |
| B | Harder elastomers and plastics. Paper and fibrous materials, Use above 93 A scale. | Sharp cone point, 30° |
|
822 g 1.81 lb |
| C | Medium hard elastomers and plastics. Also useful to avoid surface marks. | Flat cone point, 35° |  |
4536 g 10.0 lb |
| D | Hard rubber and plastics such as thermo plastics, flooring and bowling balls. | Sharp cone point, 30° |
|
4536 g 10.0 lb |
| DO | Dense granular material and textile windings. | 3/32" Spherical |
|
4536 g 10.0 lb |
| O | Very soft elastomers, textile windings and soft granular materials. Use below 20 A scale. | 3/32" Spherical |
|
822 g 1.81 lb |
| OO | Light foams, sponge rubber gels and animal tissue. | 3/32" Spherical |
|
113 g 0.25 lb |
| OOO | Ultra soft gels and sponge rubber. | 1/2" Spherical |
|
113 g 0.25 lb |
| M | Materials as thin as .050" | Sharp cone point, 30° |
|
- |
| Type |
Comparision Table |
 |
|
This chart is for comparison purposes only. It cannot be used for conversion reference.
| Durometer Spring Force Calibration - All Values in Newtons (N) | ||||
| Indicated Value | Type M | Type A, B, O | Type C, D, DO | Type OO |
| 0 | 0.324 | 0.55 | 0.203 | |
| 10 | 0.368 | 1.3 | 4.445 | 0.294 |
| 20 | 0.412 | 2.05 | 8.89 | 0.385 |
| 30 | 0.456 | 2.8 | 13.335 | 0.476 |
| 40 | 0.5 | 3.55 | 17.78 | 0.666 |
| 50 | 0.544 | 4.3 | 22.225 | 0.667 |
| 60 | 0.589 | 5.05 | 26.67 | 0.748 |
| 70 | 0.633 | 5.8 | 31.115 | 0.839 |
| 80 | 0.677 | 6.55 | 35.56 | 0.93 |
| 90 | 0.721 | 7.3 | 40.005 | 1.02 |
| 100 | 0.765 | 8.05 | 44.45 | 1.111 |
| N/durometer unit | 0.0044 | 0.075 | 0.4445 | 0.00908 |
| Cal Tolerance | ±0.0176 N | ±0.075 N | ±0.4445 N | ±0.0182 N |
Operating Stand |
Durometer Type |
A, B, E and O |
|
A, B, E and O |
|
M |
|
OO, OOO and OOO-S |
|
OO, OOO, OOO-S and M |
|
A, B, C, D, E, DO, O, OO, OOO |

